添加一个系统调用,实现对指定进程的 nice 值的修改或读取功能,并返回进程最新的 nice 值及优先级 prio。
视频教程地址:
https://www.bilibili.com/video/av47274857
源码地址:
https://github.com/leslievan/Operator_System/tree/master/Operator_System_Lab1
以下内容全部在 Ubuntu 18.04 下操作,使用其他发行版的同学可在此基础上自行修改。
实验内容
- 添加一个系统调用,实现对指定进程的 nice 值的修改或读取功能,并返回进程最新的 nice 值及优先级 prio。
- 写一个简单的应用程序测试添加的系统调用。
- 若程序中调用了 Linux 的内核函数,要求深入阅读相关函数源码。
准备工作
安装 Linux 虚拟机
为免于重装系统,建议你使用 VMware 创建一个 Linux 虚拟机,在虚拟机下进行内核编译与安装,坏处是虚拟机的性能远不如主机,使得编译时长可能翻倍,好处是不管你怎么折腾,都不会弄坏自己的主机系统。
- 安装 VMware,请查看这篇文章:Ubuntu 下配置 VMware Workstation
- 安装虚拟机,请查看这篇文章:在 VMware Workstation 中创建虚拟机
获取内核源码
从 The Linux Kernel Archives 获取 Linux 的内核源码,任意选择一个版本,建议使用 longterm 版本。
戳这里下载 linux-4.19.113.tar.xz。

解压内核源码
可以通过命令行或图形界面进行解压:
-
右键单击内核压缩包,点击解压
-
或在终端键入如下命令检查文件是否存在。(系统语言为中文的请将
Downloads替换为下载)。cd ~/Downloads tar xvJf linux-4.19.25.tar.xztar命令参数解释参见附录 1-tar.
修改内核
修改系统调用表
根据上一步内核源码解压目录,定位系统调用表:
# 将~/Downloads/linux-4.19.113替换为你的内核源码解压目录
gedit ~/Downloads/linux-4.19.113/arch/x86/entry/syscalls/syscall_64.tbl
可以看到格式为:"number" "abi" "name" "entry point"。
定位到 common/64 的最后一条:
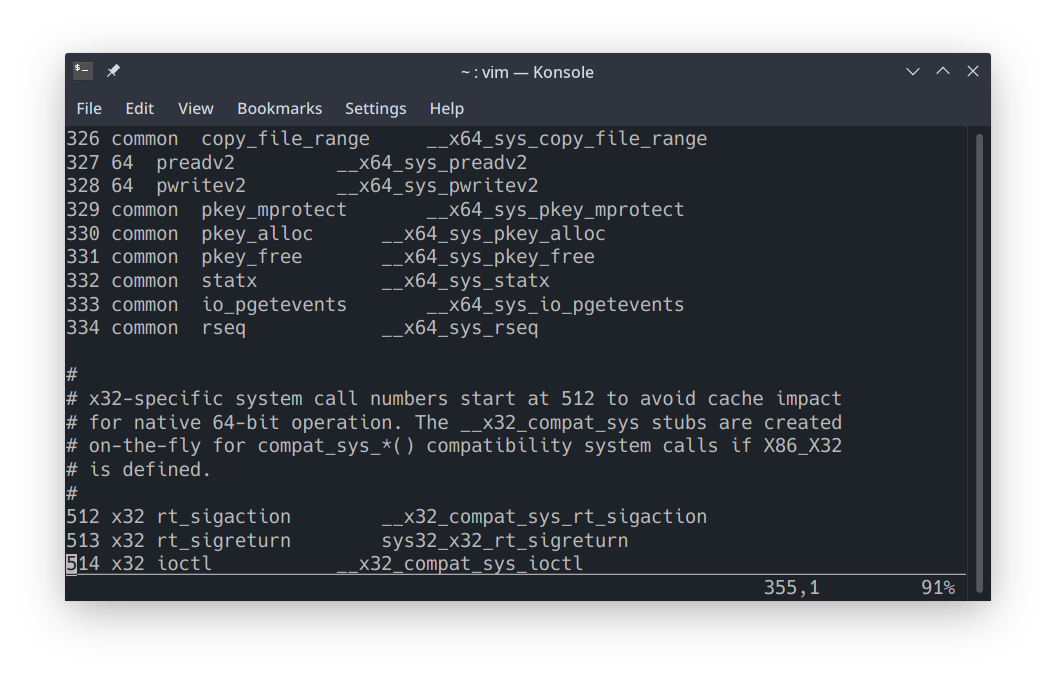
在下面添加:
335 64 mysetnice __x64_sys_mysetnice
申明系统调用服务例程原型
根据内核源码解压目录,定位系统调用头文件:
# 将~/Downloads/linux-4.19.113替换为你的内核源码解压目录
gedit ~/Downloads/linux-4.19.113/include/linux/syscalls.h
定位到最后一行:
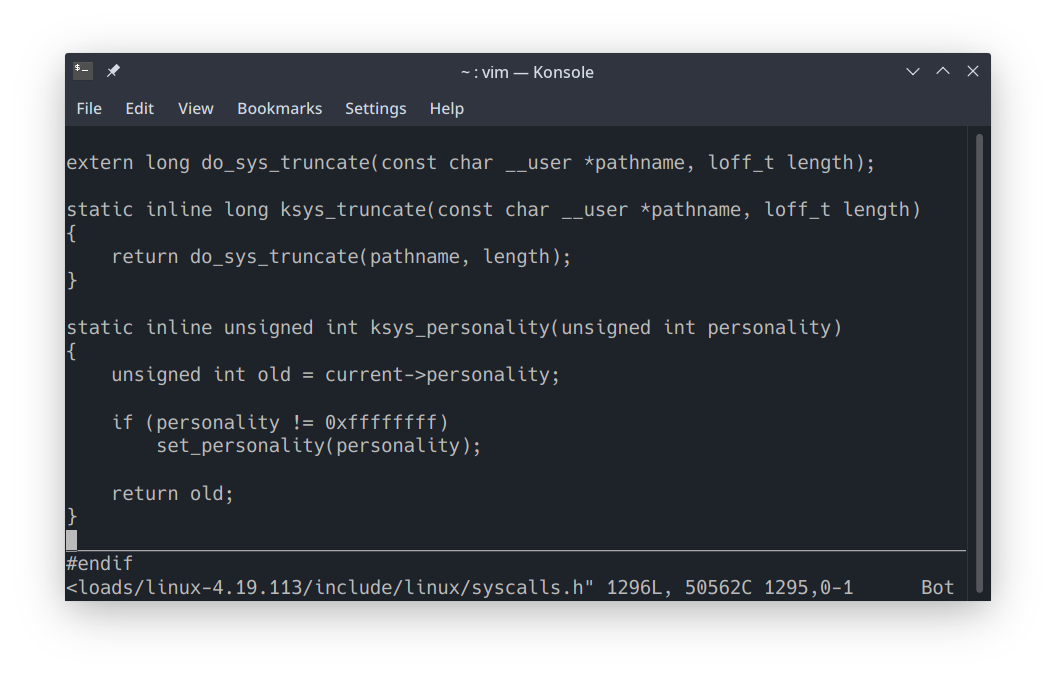
在 endif 前面添加系统调用原型声明:
asmlinkage long sys_mysetnice(pid_t pid, int flag, int nicevaluse, void __user* prio, v
实现系统调用服务例程
这一步与上一步的关系,就是 C 语言中头文件与实现文件的关系,上一步对函数进行了声明,这里给函数一个具体的实现。
需要实现的任务为:
添加一个系统调用,对指定进程的 nice 值的修改及读取的功能,同时返回进程最新的 nice 值及优先级 prio。
分解为四步:
- 根据进程号 pid 找到相应的进程控制块 PCB(因为进程控制块中记录了用于描述进程情况及控制进程运行所需要的全部信息,nice 值和优先级正是其中的一部分);
- 根据 PCB 读取它的 nice 值和优先级 prio;
- 根据 PCB 对相应进程的 nice 值进行修改;
- 将得到的 nice 值和优先级 prio 进行返回。
根据内核源码解压目录,定位系统调用头文件:
# 将~/Downloads/linux-4.19.113替换为你的内核源码解压目录
gedit ~/Downloads/linux-4.19.113/include/linux/syscalls.h
定位到最后一行:
 在
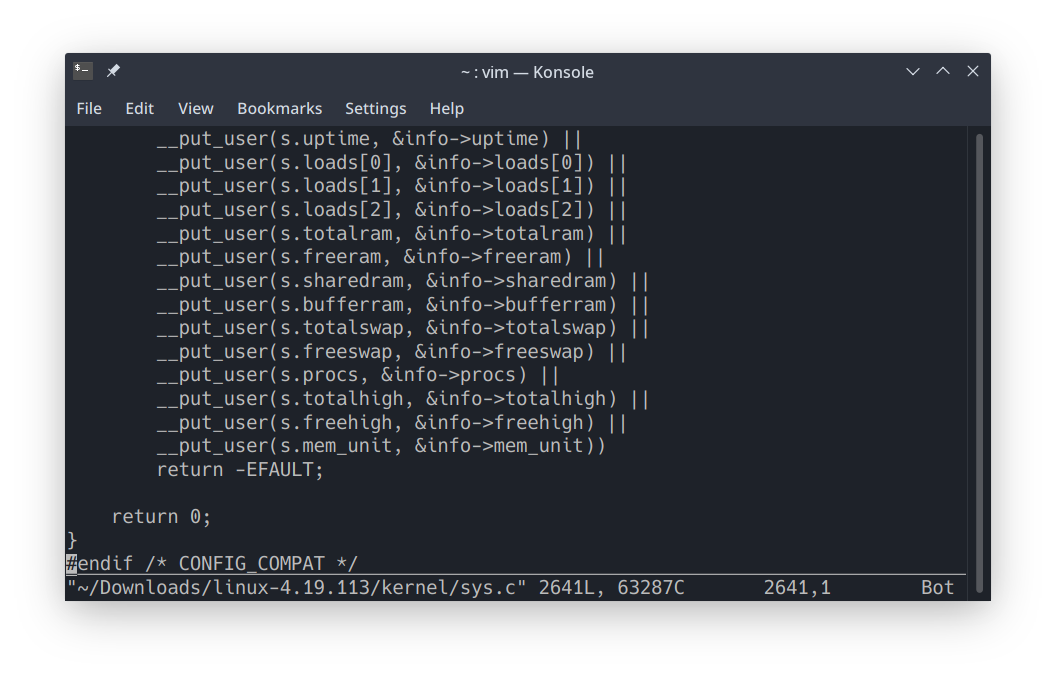
在 endif 前面添加系统调用服务例程实现代码:
// 置于sys.c的最末端(在‘#endif’之前
SYSCALL_DEFINE5(mysetnice, pid_t, pid, int, flag, int, nicevalue, void __user *,
                prio, void __user *, nice) {
    int cur_prio, cur_nice;
    struct pid *ppid;
    struct task_struct *pcb;

    // 通过进程PID号找到进程的PID结构体,如果ppid为空指针则代表不存在与进程号与pid相同的进程,此时返回EFAULT(
    // 我编译的时候这个if判断并没有加进去,想做出上述判断的可以将注释删去,就逻辑本身而言没有问题-_-
    // 但我无法保证最后是否会出问题,因为我没有自己尝试过
    ppid = find_get_pid(pid);
    /*
    if (ppid == NULL)
        return EFAULT;
    */

    // 通过进程的PID结构体,找到与之对应的进程控制块
    pcb = pid_task(ppid, PIDTYPE_PID);

    // 如果flag=1则修改进程的nice值为nicevalue
    if (flag == 1) {
        set_user_nice(pcb, nicevalue);
    }  // flag既不为1也不为0的时候,即flag出错,此时返回EFAULT
    else if (flag != 0) {
        return EFAULT;
    }

    // 获取进程当前的最新nice值和prio值
    cur_prio = task_prio(pcb);
    cur_nice = task_nice(pcb);

    // 由于系统调用是在内核态下运行的,所有数据均为内核空间的数据,
    // 利用copy_to_user()函数将内核空间的数据复制到用户空间
    copy_to_user(prio, &cur_prio, sizeof(cur_prio));
    copy_to_user(nice, &cur_nice, sizeof(cur_nice));

    return 0;
}
需要用到的几个内核函数:
struct pid *find_get_pid(pid_t nr):根据进程标识符号返回相应的进程标识符struct task_struct *pid_task(struct pid *pid, enum pid_type type):根据进程标识符和进程类型返回进程控制块int task_prio(const struct task_struct *p):返回该 PCB 的 prio 参数static inline int task_nice(const struct task_struct *p):返回该 PCB 的 nice 参数void set_user_nice(struct task_struct *p, long nice):修改 PCB 的 nice 参数static __always_inline unsigned long __must_check copy_to_user(void __user *to, const void *from, unsigned long n):将变量从内核空间复制到用户空间
内核函数具体实现见附录 2
编译内核
修改好内核后,开始进行编译。
安装依赖
以下是一些需要用到的包,用 apt/apt-get 进行安装,命令行输入:
sudo apt-get install libncurses5-dev make openssl libssl-dev bison flex libelf-dev
参数确认
定位内核源码解压目录,命令行运行:
# 将~/Downloads/linux-4.19.113替换为你的内核源码解压目录
cd ~/Downloads/linux-4.19.113
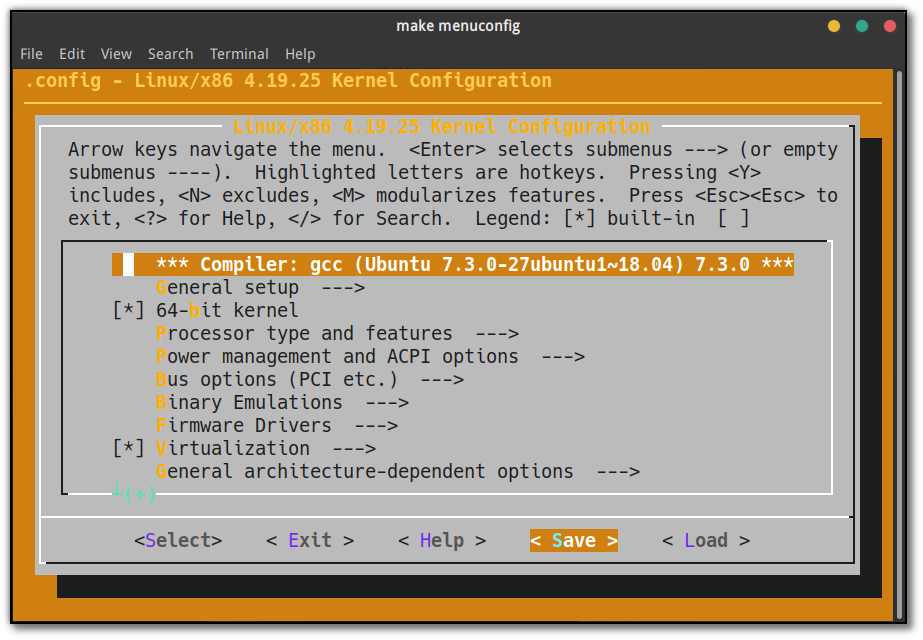
命令行运行 make,开始编译前的参数确认:
make menuconfig
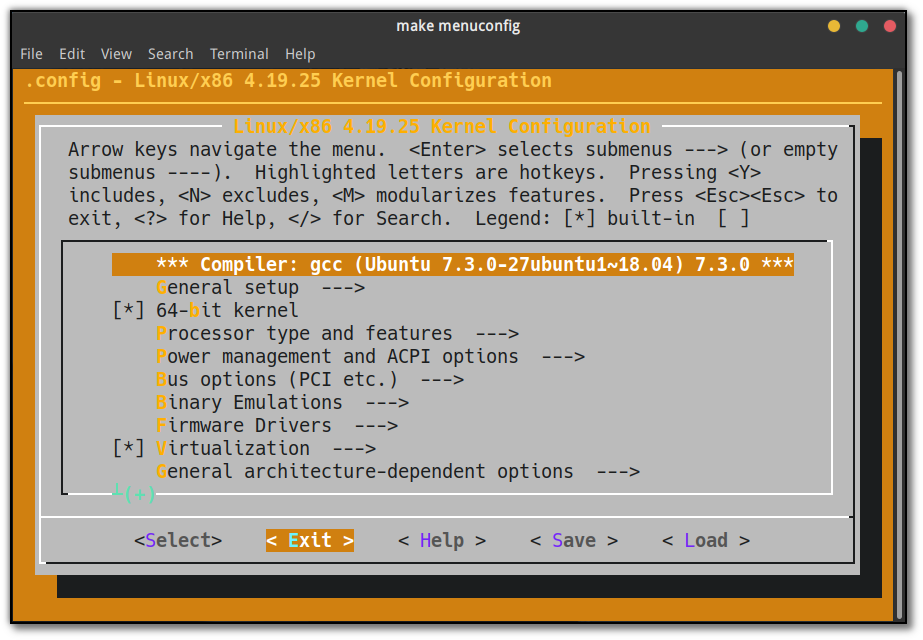
出现如下所示界面后,左右键移动下方光标选中 Save,按 Enter 结束。
点击 Ok 和之后出现的 Exit。
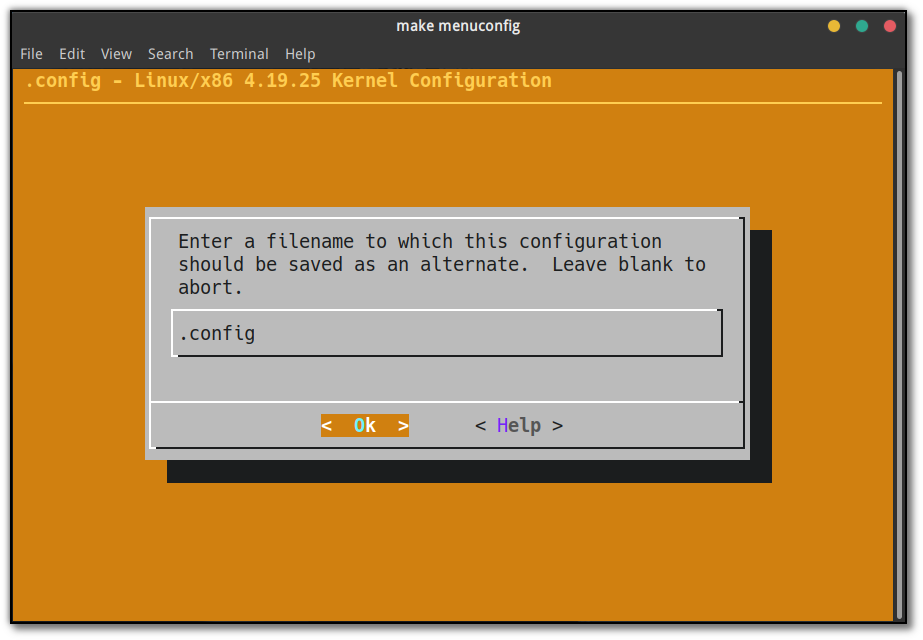

左右键移动光标,选中 Exit,Enter 键结束这一步。
编译
编译内核需要耗费的时间较长,建议通电进行。
定位内核源码解压目录,命令行运行:
sudo make -j4 2> error.log
-j4 表示使用四线程进行编译,这个过程大概持续一个小时,后面的重定向将错误信息输出到了 error.log 这个文件里面,方便之后进行错误排查。
make命令默认是指编译所有,包括内核和模块,所以不需要再重新使用make modules进行模块的编译(至少我并没有在这个地方受到困扰)。如果碰到问题请查阅附录 3。
安装内核
等待内核、模块均编译完成,开始安装内核,分为两步:
-
安装模块
# 大约持续十几分钟到几十分钟不等 sudo make modules_install -
替换内核
# 大约持续几分钟到十几分钟不等
sudo make install
替换完成后重启你的电脑,准备下一步的测试,如果电脑打不开可以参考附录 3。
测试
完成编译工作后,需要编写一个用户态程序,测试系统调用是否正常工作,这里直接给出 demo.c,请自行查阅理解。
demo.clink
// demo.c
#include "unistd.h"
#include "sys/syscall.h"
#include "stdio.h"
#define _SYSCALL_MYSETNICE_ 335
#define EFALUT 14

int main()
{
    int pid, flag, nicevalue;
    int prev_prio, prev_nice, cur_prio, cur_nice;
    int result;

    printf("Please input variable(pid, flag, nicevalue): ");
    scanf("%d%d%d", &pid, &flag, &nicevalue);

    result = syscall(_SYSCALL_MYSETNICE_, pid, 0, nicevalue, &prev_prio,
                     &prev_nice);
    if (result == EFALUT)
    {
        printf("ERROR!");
        return 1;
    }

    if (flag == 1)
    {
        syscall(_SYSCALL_MYSETNICE_, pid, 1, nicevalue, &cur_prio, &cur_nice);
        printf("Original priority is: [%d], original nice is [%d]\n", prev_prio,
               prev_nice);
        printf("Current priority is : [%d], current nice is [%d]\n", cur_prio,
               cur_nice);
    }
    else if (flag == 0)
    {
        printf("Current priority is : [%d], current nice is [%d]\n", prev_prio,
               prev_nice);
    }

    return 0;
}
命令行使用 gcc 进行编译,根据提示信息输入 pid、flag 和 nicevalue 进行测试。
# 将~/demo.c替换为你的demo.c所在位置
gcc ~/demo.c -o demo
./demo
附录
附录 1:tar
tar xvJf linux-4.19.133.tar.bz
tar 命令可以为 linux 的文件和目录创建档案,利用 tar 可以把一大堆的文件和目录全部打包成一个文件。
- -x 或–extract 或–get:从备份文件中还原文件,即解压
- -v:显示操作过程,即显示进度
- -j:支持 bzip2 解压文件,即解压 tar.bz 文件
- -f <备份文件> 或–file=< 备份文件 >:指定备份文件,即解压对应路径的文件
附录 2:内核函数
find_get_pid()
struct pid *find_get_pid(pid_t nr)
{
	struct pid *pid;

	rcu_read_lock();
	pid = get_pid(find_vpid(nr));
	rcu_read_unlock();

	return pid;
}
pid_task()
struct task_struct *pid_task(struct pid *pid, enum pid_type type)
{
	struct task_struct *result = NULL;
	if (pid) {
		struct hlist_node *first;
		first = rcu_dereference_check(hlist_first_rcu(&pid->tasks[type]),
					      lockdep_tasklist_lock_is_held());
		if (first)
			result = hlist_entry(first, struct task_struct, pid_links[(type)]);
	}
	return result;
}
task_prio()
int task_prio(const struct task_struct *p)
{
	return p->prio - MAX_RT_PRIO;
}
task_nice()
static inline int task_nice(const struct task_struct *p)
{
	return PRIO_TO_NICE((p)->static_prio);
}
set_user_nice()
void set_user_nice(struct task_struct *p, long nice)
{
	bool queued, running;
	int old_prio, delta;
	struct rq_flags rf;
	struct rq *rq;

	if (task_nice(p) == nice || nice < MIN_NICE || nice > MAX_NICE)
		return;
	/*
	 * We have to be careful, if called from sys_setpriority(),
	 * the task might be in the middle of scheduling on another CPU.
	 */
	rq = task_rq_lock(p, &rf);
	update_rq_clock(rq);

	/*
	 * The RT priorities are set via sched_setscheduler(), but we still
	 * allow the 'normal' nice value to be set - but as expected
	 * it wont have any effect on scheduling until the task is
	 * SCHED_DEADLINE, SCHED_FIFO or SCHED_RR:
	 */
	if (task_has_dl_policy(p) || task_has_rt_policy(p)) {
		p->static_prio = NICE_TO_PRIO(nice);
		goto out_unlock;
	}
	queued = task_on_rq_queued(p);
	running = task_current(rq, p);
	if (queued)
		dequeue_task(rq, p, DEQUEUE_SAVE | DEQUEUE_NOCLOCK);
	if (running)
		put_prev_task(rq, p);

	p->static_prio = NICE_TO_PRIO(nice);
	set_load_weight(p, true);
	old_prio = p->prio;
	p->prio = effective_prio(p);
	delta = p->prio - old_prio;

	if (queued) {
		enqueue_task(rq, p, ENQUEUE_RESTORE | ENQUEUE_NOCLOCK);
		/*
		 * If the task increased its priority or is running and
		 * lowered its priority, then reschedule its CPU:
		 */
		if (delta < 0 || (delta > 0 && task_running(rq, p)))
			resched_curr(rq);
	}
	if (running)
		set_curr_task(rq, p);
out_unlock:
	task_rq_unlock(rq, p, &rf);
}
copy_to_user()
static __always_inline unsigned long __must_check copy_to_user(void __user *to, const void *from, unsigned long n)
{
	if (likely(check_copy_size(from, n, true)))
		n = _copy_to_user(to, from, n);
	return n;
}
附录 3:Q&A
每次出现错误后都需要执行
sudo make clean清除残余文件! 每次出现错误后都需要执行sudo make clean清除残余文件! 每次出现错误后都需要执行sudo make clean清除残余文件!
Q1:在完成所有步骤重启系统时,提示:Kernel panic - not syncing: System is deadlocked on memory
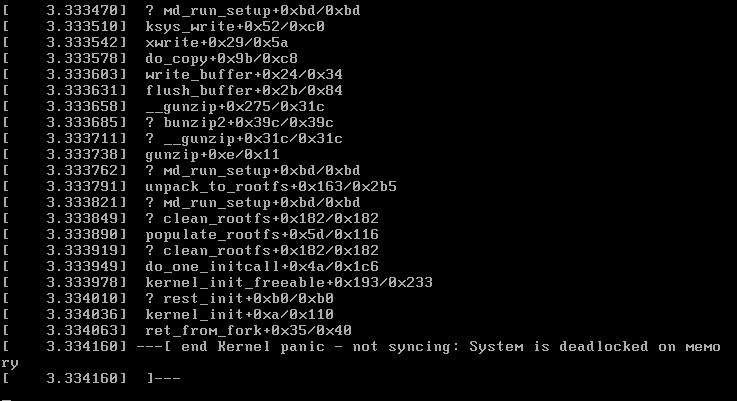
A1:原因是只给虚拟机分配了 2G 的内存,导致了系统在内存上的死锁,将虚拟机内存扩充至 4G 后解决。
Q2:编译时提示 gcc: error: unrecognized command line option '-fno-plt',如下所示:
HOSTCC scripts/selinux/genheaders/genheaders
HOSTCC scripts/selinux/mdp/mdp
gcc: error: unrecognized command line option ‘-fno-plt’
gcc: error: unrecognized command line option ‘-fno-plt’
HOSTCC /root/linux52/linux-5.2.13/tools/objtool/fixdep.o
HOSTLD /root/linux52/linux-5.2.13/tools/objtool/fixdep-in.o
LINK /root/linux52/linux-5.2.13/tools/objtool/fixdep
CC /root/linux52/linux-5.2.13/tools/objtool/arch/x86/decode.o
gcc: error: unrecognized command line option ‘-fno-plt’
A2:原因是gcc版本过低,-fno-plt标志是gcc6才提出的,可以用命令gcc –version查看自己的版本。可以先尝试使用sudo apt-get install gcc6,但在部分系统中,并未收录gcc6,如果直接安装的方法无效,显示无法定位软件包的话,可以采用手动添加PPA的方法:
curl https://gist.githubusercontent.com/leslievan/3c2872d7b375c22a2df60c57dbf7bd27/raw/8ef3b032797b03dec824707ad6294aa43301ab8d/ubuntu-install-gcc-6 | bash
Q3:编译时提示 /bin/sh: 1: bc: not found,如下所示:
 CALL    scripts/atomic/check-atomics.sh
/bin/sh: 1: bc: not found
Kbuild:26: recipe for target 'include/generated/timeconst.h' failed
make[1]: *** [include/generated/timeconst.h] Error 127
make[1]: *** 正在等待未完成的任务....
A3:原因是没有安装 bc,执行 sudo apt-get install bc 将它安装上即可,出现类似的 xxx: not found 的错误都可以尝试使用 sudo apt-get install xxx 安装后再次尝试。